When people think of home improvement, they typically associate it with what they can see. But what isn’t visible can be most problematic for your home, especially when it comes to foundation problems. Your house is built on top of the foundation, which is the only thing between it and the ground. Therefore, issues such as wet or unstable soil can create big problems that foundation waterproofing can protect your home from.
Why Waterproof a Foundation?
Waterproofing your foundation can:
- Prevent Flooding: Directing water away from the foundation prevents it from flooding the lower parts of your home.
- Protect Your Basement: By creating a waterproof barrier, water can be diverted away, so whatever you store in your basement will be protected.
- Reduce Moisture: A water-logged foundation is a source for water to evaporate and travel upwards, where it can support mold, oxidize metal, and increase the perceived temperature.
- Avoid Property Damage: Water can cause extensive damage to floorboards, walls, and belongings as well as cause the foundation to shift.
How to Prepare to Waterproof a Foundation
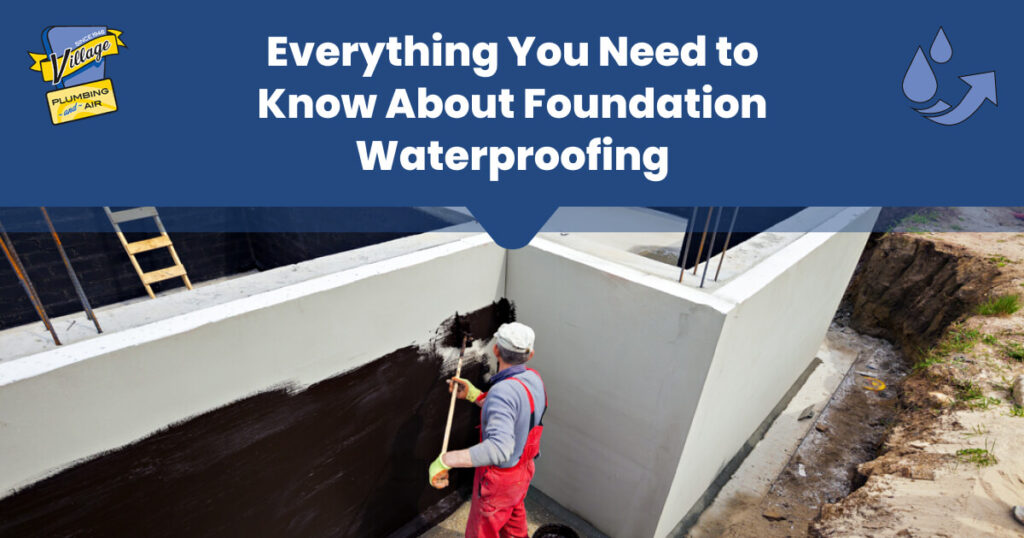
Foundation waterproofing requires the help of a skilled contractor. It also requires a great deal of surface preparation. Whether the contractor does so or not, make sure the foundation wall and footing are clean and free of loose material. The surface must be smooth and free of loose concrete. Voids or honeycombs must be filled with grout or cement and form-tie holes and smaller voids need to be sealed as well; a trowel-grade mastic is usually best-suited for these.
The entire surface to be waterproofed needs to be inspected. Key steps include drying off all footings, which may require sweeping away standing water and drying damp spots with a propane torch. Concrete form ties should be removed with a cutting torch or reciprocating saw; those inside the foundation should be removed too. Dust and mud should be cleaned from the walls and footings. Excess and loose material can be scraped off with a long-handled ice breaker or brick hammer.
Steps to Foundation Waterproofing
A waterproofing system consists of three elements. These include drains to move water away from the foundation base, a treatment to prevent moisture from moving through the wall, and a means to direct water away from the building. Most of these elements are underground. A professional contractor will make sure the work is done right because it is expensive to come back and fix any problems.
If you’re going to waterproof your home’s foundation, here are some of the most important considerations:
- Planning
Concrete waterproofing must be performed under ideal conditions. Rain and cold temperatures can cause problems, so plan for delays related to weather. A reputed waterproofer may be in high demand so this can impact scheduling as well. Layout is important too; if this is planned right, unsightly waterproofing will be hidden below grade. Changes in grade level can be a challenge; a retaining wall can compromise waterproofing especially if it descends at a diagonal between different levels. - Construction Best Practices
Layout lines should be clearly marked, especially if the grade varies. All below-grade form-tie holes should be protected. The contractor should also plan in advance how they’re going to handle basement windows, bulkheads, intersecting walls, and porch foundations that don’t need to be treated.
In general, any foundation wall with earth on one side and usable space on the other should be waterproofed. Also, waterproofing should extend at least 1 foot onto intersecting walls that don’t need waterproofing. If the site is extremely wet, treatment can extend to other walls as well.
- Curing Time
Concrete curing time is a crucial factor when applying a waterproofing membrane. Most concrete requires seven days, but check the manufacturer’s guidelines for the product you use. If waterproofing is applied too soon, water vapor escaping curing concrete can prevent the membrane from bonding properly. For liquid membranes, you may get started once the forms are removed or need to wait 14 days or more. - Protecting Waterproofing
To protect the waterproofing system during backfilling, use a manufacturer-supplied protection board or your own drainage mat or insulation. You can also use a 1-inch-thick expanded-polystyrene board. The adhesive used to secure the board must be compatible with the membrane, or else the membrane may degrade.
Safety
Any waterproofing contractor should have a documented safety program. They must be familiar with all hazard communication standards as well. Only contractors and professionals actively involved in waterproofing should be able to access the area.
There are many safety concerns associated with foundation waterproofing. Flammable, solvent-based products represent a major hazard; some can ignite when exposed to any source of ignition, such as a cutting torch, welder, or fire. Solvent vapors can be deadly, especially where they concentrate in excavation areas, as they’re heavier than air; therefore, anyone working on waterproofing should use a manufacturer-recommended respirator.
Chemicals in waterproofing materials can cause skin injuries, so protective clothing and gloves are needed. Chemical-resistant gloves should also be worn when using solvent to clean tools. Protective eyewear is highly recommended as well. And, if using spray equipment, avoid contact with high-pressure sprays that can inject toxic compounds directly into the body.
Contact Village Plumbing, Air & Electric
Foundation problems are usually caused by water. If an issue in your plumbing system is causing foundation damage or basement flooding, our licensed technicians can diagnose and fix it. We have been addressing the plumbing needs of Houston-area homeowners since 1946. To make plumbing services more affordable, we offer our Village Partner Plan, coupons, and financing. To get started, request service online or call (713) 526-1491 today.


